
Managing Structures: Dwellings, Units, ADUs, and Outbuildings
UAD 3.6 doesn't describe a property as one building — it describes it as a set of structures: the dwellings on the lot, the living units inside each one, and any outbuildings. Manage Structures is where you lay that out, and it shapes the rest of your report.
Why this matters
For a straightforward single-family home, the default structure is already correct and you may never need to open this screen. But as soon as a property has more than one living unit — a duplex, a home with an ADU over the garage, two houses on one lot — you need to tell DataMaster how those pieces fit together.
Everything downstream keys off that layout. The Unit Interior section builds one tab per unit and names it from your identifiers. Unit-scoped grid rows follow the same structure. The MISMO file you export carries it too. Setting structures up before you fill in unit-level detail saves you from re-entering it later.
Manage Structures
There are two ways in, and both open the same dialog.
From the Sales Comparison Grid, click Structures in the toolbar:

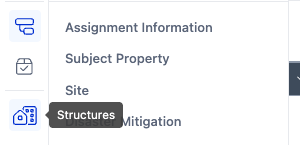
Or, from any section of the report, click the Structures icon in the left icon rail:
Choosing a property
Structures are defined per property. The dropdown at the top of the dialog lists your Subject and every Comp in the report — switch between them without closing the dialog.
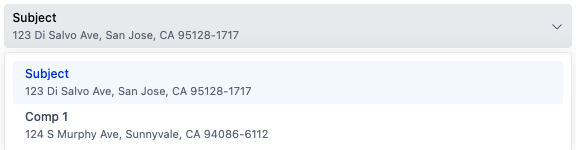
Pick the property whose structures you want to edit.
The Dwellings tab
A dwelling is a building that contains living units. A unit is a single living space inside it. How that maps to real properties:
Property | Structure |
|---|---|
Single-family home | 1 dwelling, 1 unit |
Duplex | 1 dwelling, 2 units |
Home with an attached ADU | 1 dwelling, 1 unit + 1 ADU |
Two detached houses on one lot | 2 dwellings, 1 unit each |
Home with a detached casita | 1 dwelling + 1 outbuilding holding the ADU |
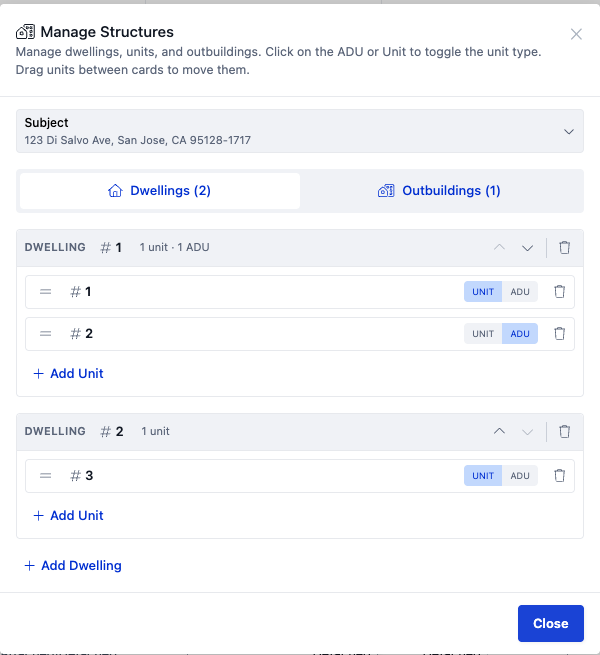
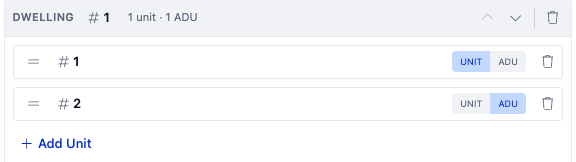
A subject with two dwellings: the first holds a unit and an ADU, the second holds one unit.
Reading a dwelling card
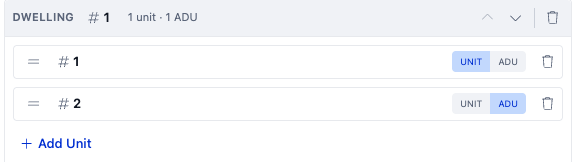
Each card header shows the dwelling's identifier and a summary of what's inside it.
The identifier (
# 1) — click it to rename.The summary (
1 unit · 1 ADU) — what the dwelling currently contains.Arrows — move the dwelling up or down in the list.
Trash — delete the dwelling.
Adding dwellings and units
Click Add Dwelling at the bottom of the tab, or Add Unit inside a card. New structures are numbered for you, so you can usually leave the identifiers alone.

A new dwelling arrives numbered and empty — add units to it next.
Marking a unit as an ADU
Every unit carries a UNIT / ADU toggle on the right. Click it to switch the unit between an ordinary living unit and an accessory dwelling unit. That's the whole action — there's nothing to save.
Moving a unit to a different dwelling
Grab a unit by the handle on its left and drag it onto another card. A line shows where it will land. This is how you fix a unit that was created under the wrong building without deleting and re-entering it.
Deleting
Deleting asks for confirmation first, because removing a dwelling also removes every unit inside it.
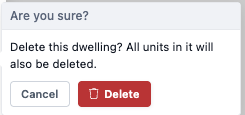
WARNING: Deleting a dwelling deletes its constituent units also. If you want to preserve them, move them into another dwelling before deleting.
Outbuildings
Outbuildings are separate structures on the site that may contain an accessory dwelling unit — a detached casita, a converted garage, a guest house.
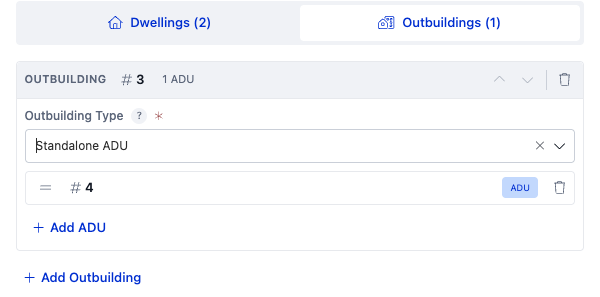
An outbuilding with its type set and one ADU inside it.
Two differences from dwellings:
Outbuilding Type is required — pick it from the dropdown on the card (for example, Standalone ADU). The red asterisk marks it as required for a complete report.
Units here are always ADUs. There's no UNIT/ADU toggle — the button reads Add ADU and each unit shows a fixed ADU badge.
Renaming, reordering, dragging units between cards, and deleting all work exactly as they do on the Dwellings tab.
Identifiers
Every dwelling, outbuilding, and unit needs an identifier. DataMaster assigns numbers as you add them, and you can click any identifier to rename it to something more meaningful.
If any identifier is blank, a warning banner appears at the top of the tab — for example "1 dwelling, 2 units missing identifier(s)" — and the affected cards and units are highlighted. Fill them in before exporting.
Where your structures show up
Open the Unit Interior section and you'll see one tab per unit, named from the structure you just defined:

Four units, four tabs — each labelled by its parent structure and its own identifier.
Reading the tabs from the example above: Unit Interior – 1 – 2 is the second unit in Dwelling 1, Unit Interior – 2 – 3 is the unit in Dwelling 2, and Unit Interior – StandaloneADU – 4 is the ADU in the outbuilding. Rename a unit in Manage Structures and these labels follow.
This is why it's worth getting structures right early: each tab holds its own area breakdown, room counts, and occupancy. Adding a unit later gives you a fresh empty tab to complete.
Summary
Open it | Structures in the Sales Grid toolbar, or the Structures icon in the left rail |
Dwelling | A building that contains living units |
Unit | One living space inside a dwelling; toggle it between UNIT and ADU |
Outbuilding | A separate structure that may hold an ADU; its type is required |
Rename | Click any identifier |
Move a unit | Drag it by its handle onto another card |
Per property | Switch between Subject and Comps with the dropdown at the top |
Set the structures up first, then fill in the unit details — the report will be organized around the layout you defined.